Motion Project Extension
Click Here to go back to the main Motion Project page.
Storyboarding Workshop
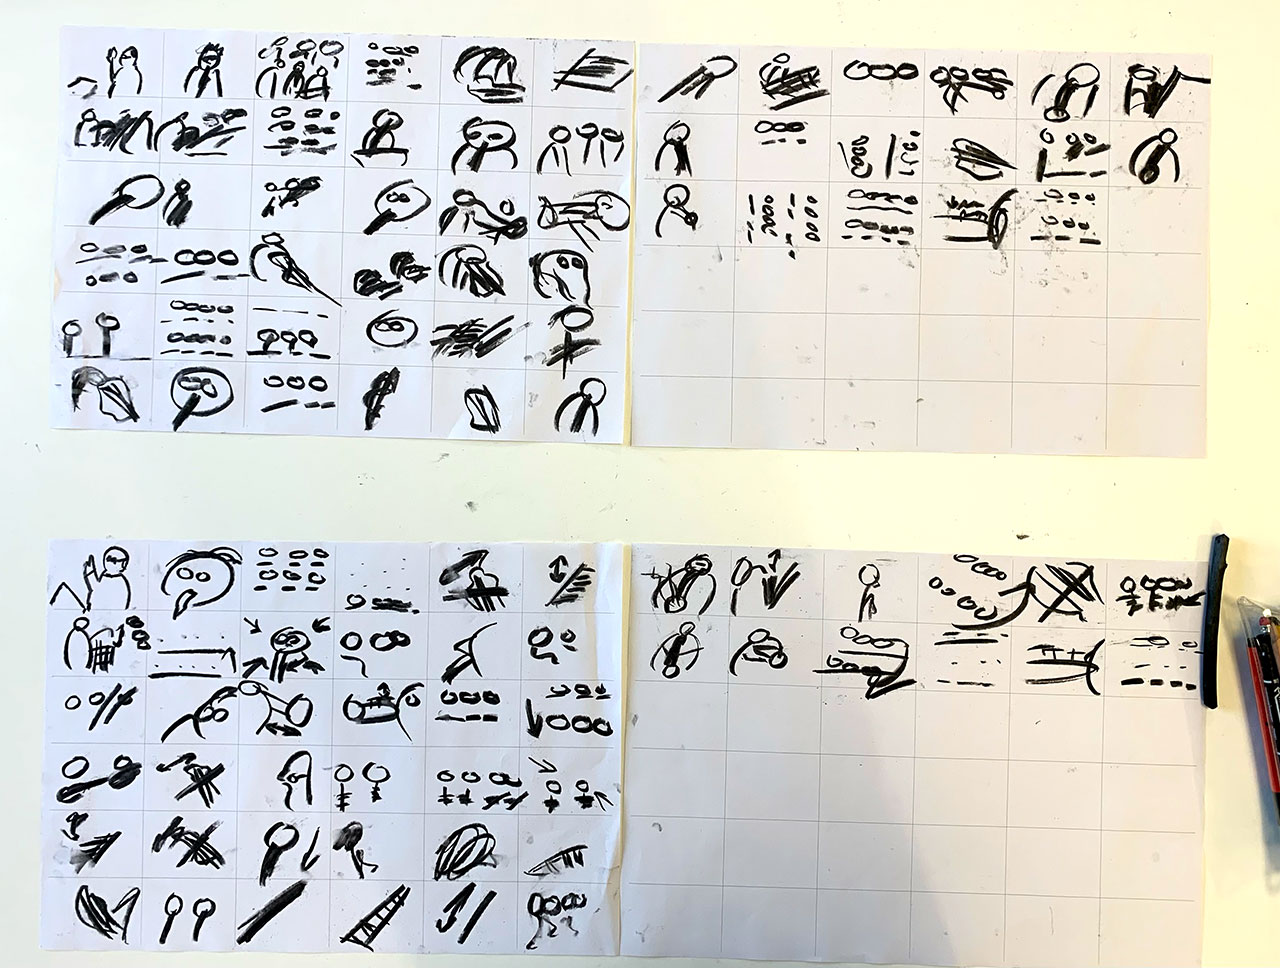
As well as showing the flipbook I thought I’d also include my sketches from the storyboarding part of the workshop. For this task we had to watch a video of an Orchestra and attempt to draw out each scene that we felt was important.
We had two runs of this, and I have attached pictures of my outcomes just here. It was incredibly fast paced to say the least, however it really made me realise just how much detail a storyboard can tell and why there important for when planning a motion sequence/animation.
Initial Sketches
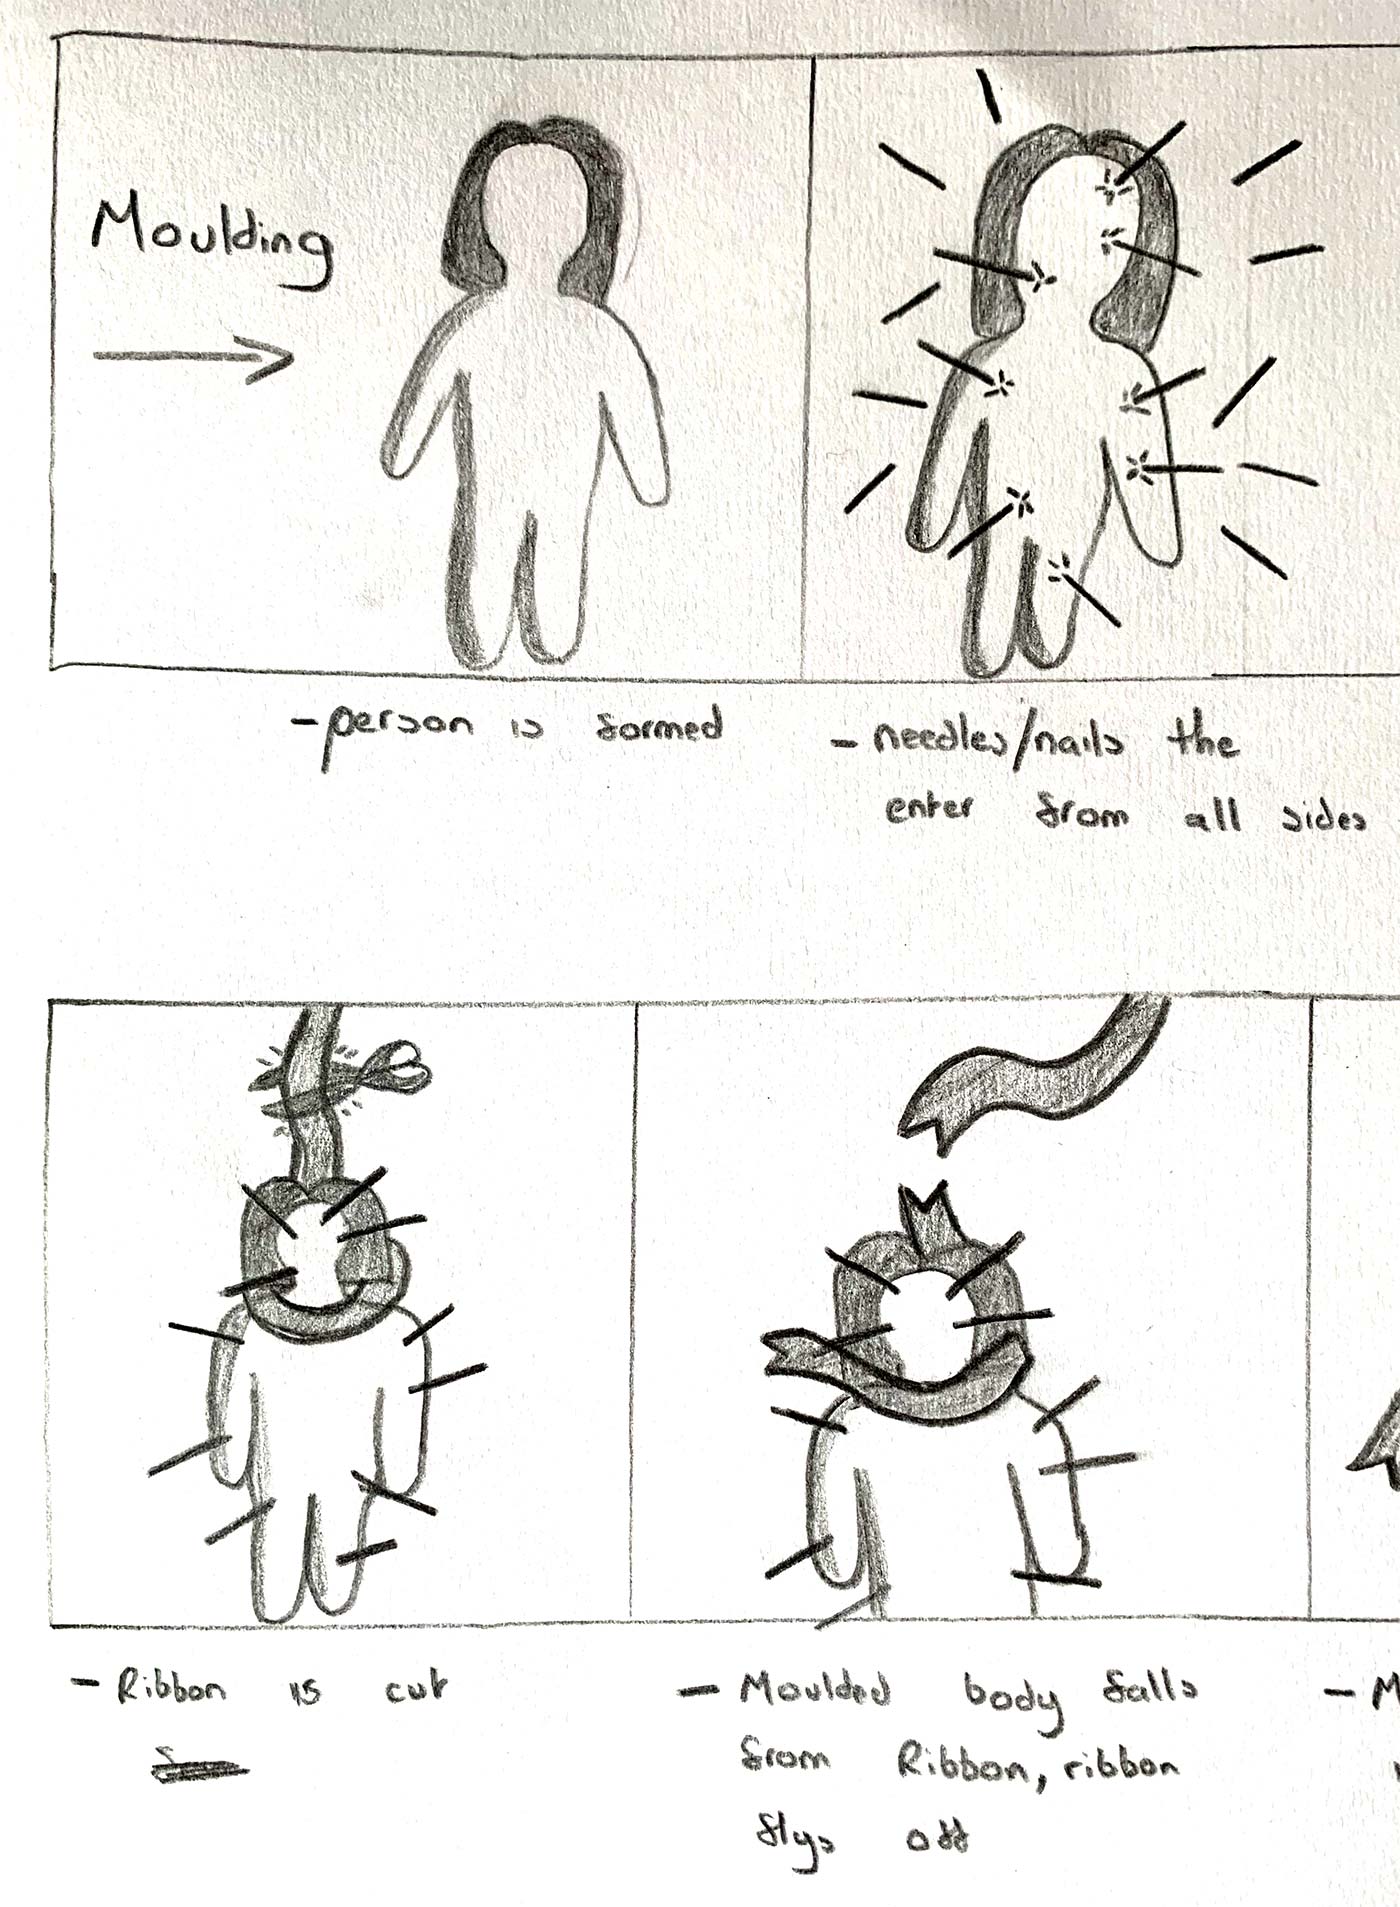
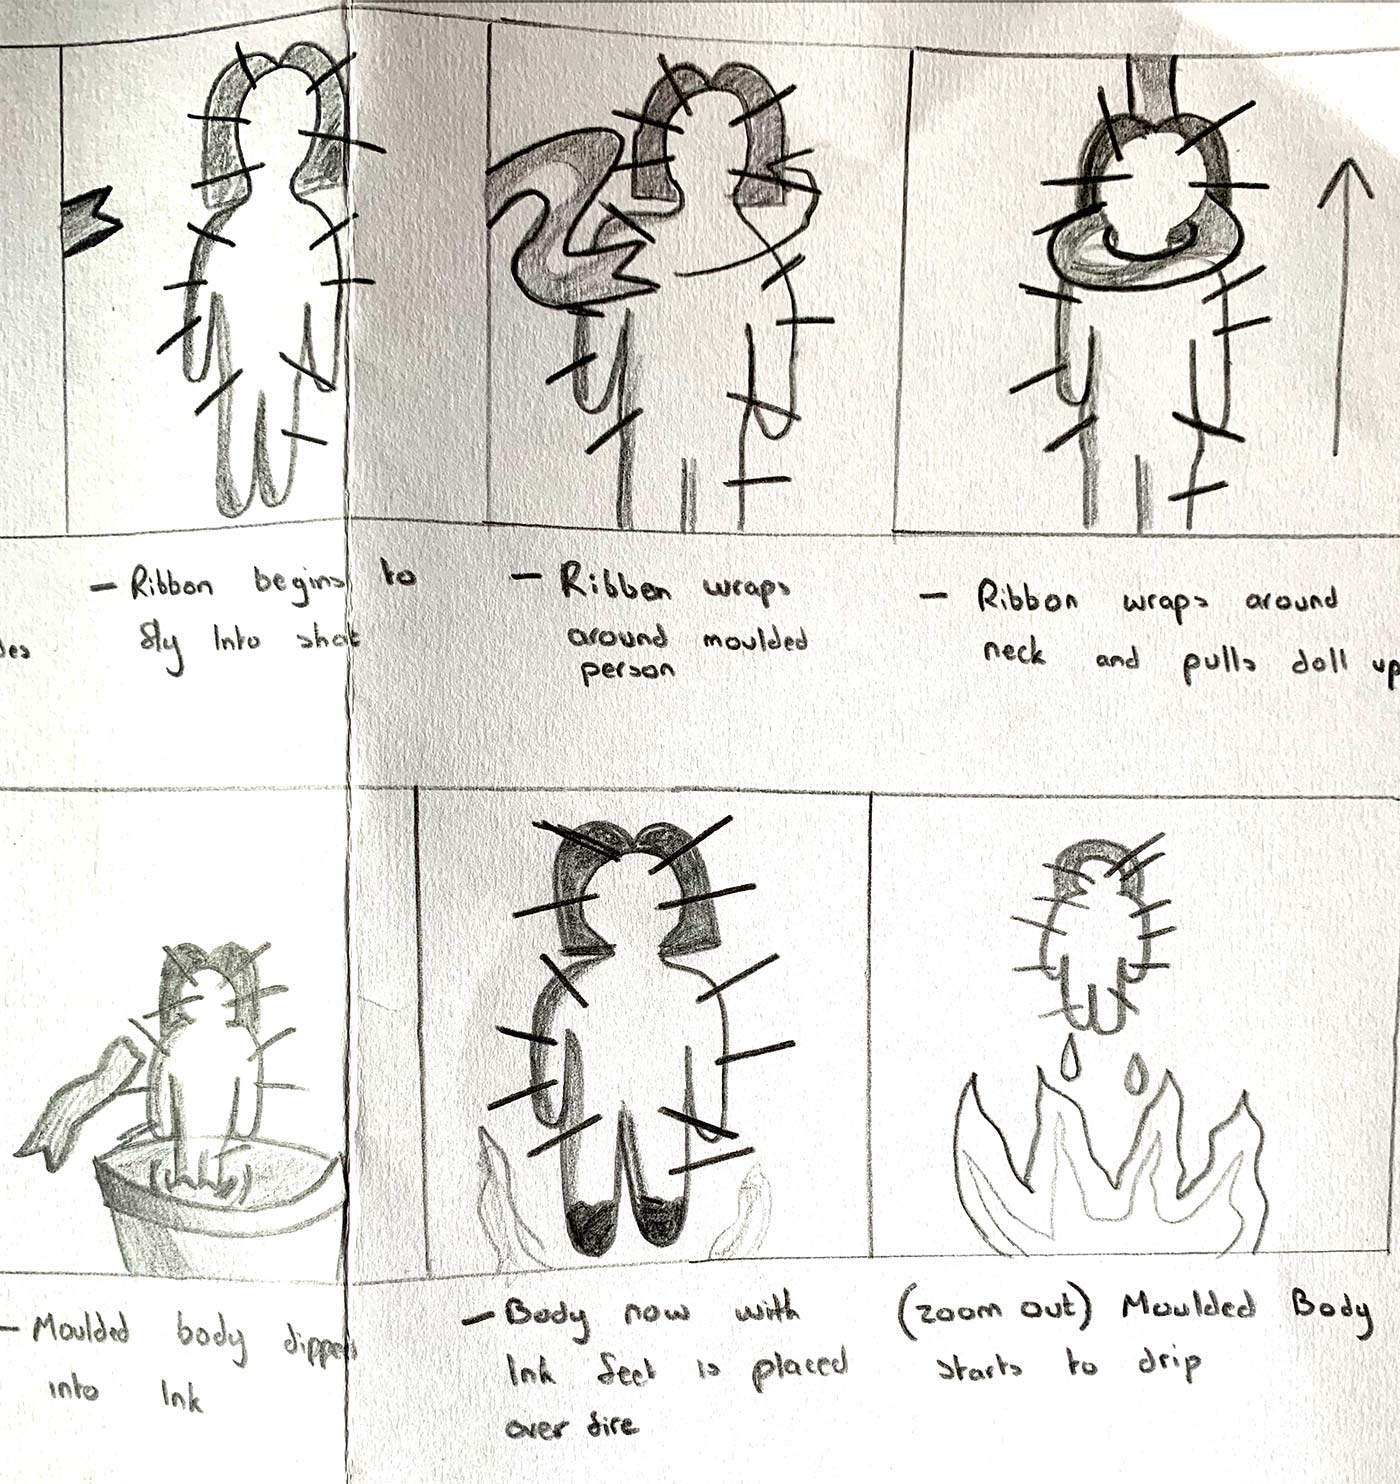
Once we had gone through the storyboarding and flipbook workshop, I then turned to drawing up some sketches relating to our concept which was inspired from ‘The Mommet’. These are just rough sketches trying to get a sense for what our visuals could look like, and what a potential storyboard could consist of. The narrative of our animation in terms of how the story is told had not yet been considered, these sketches are for visual inspiration only.
Initial Story Board
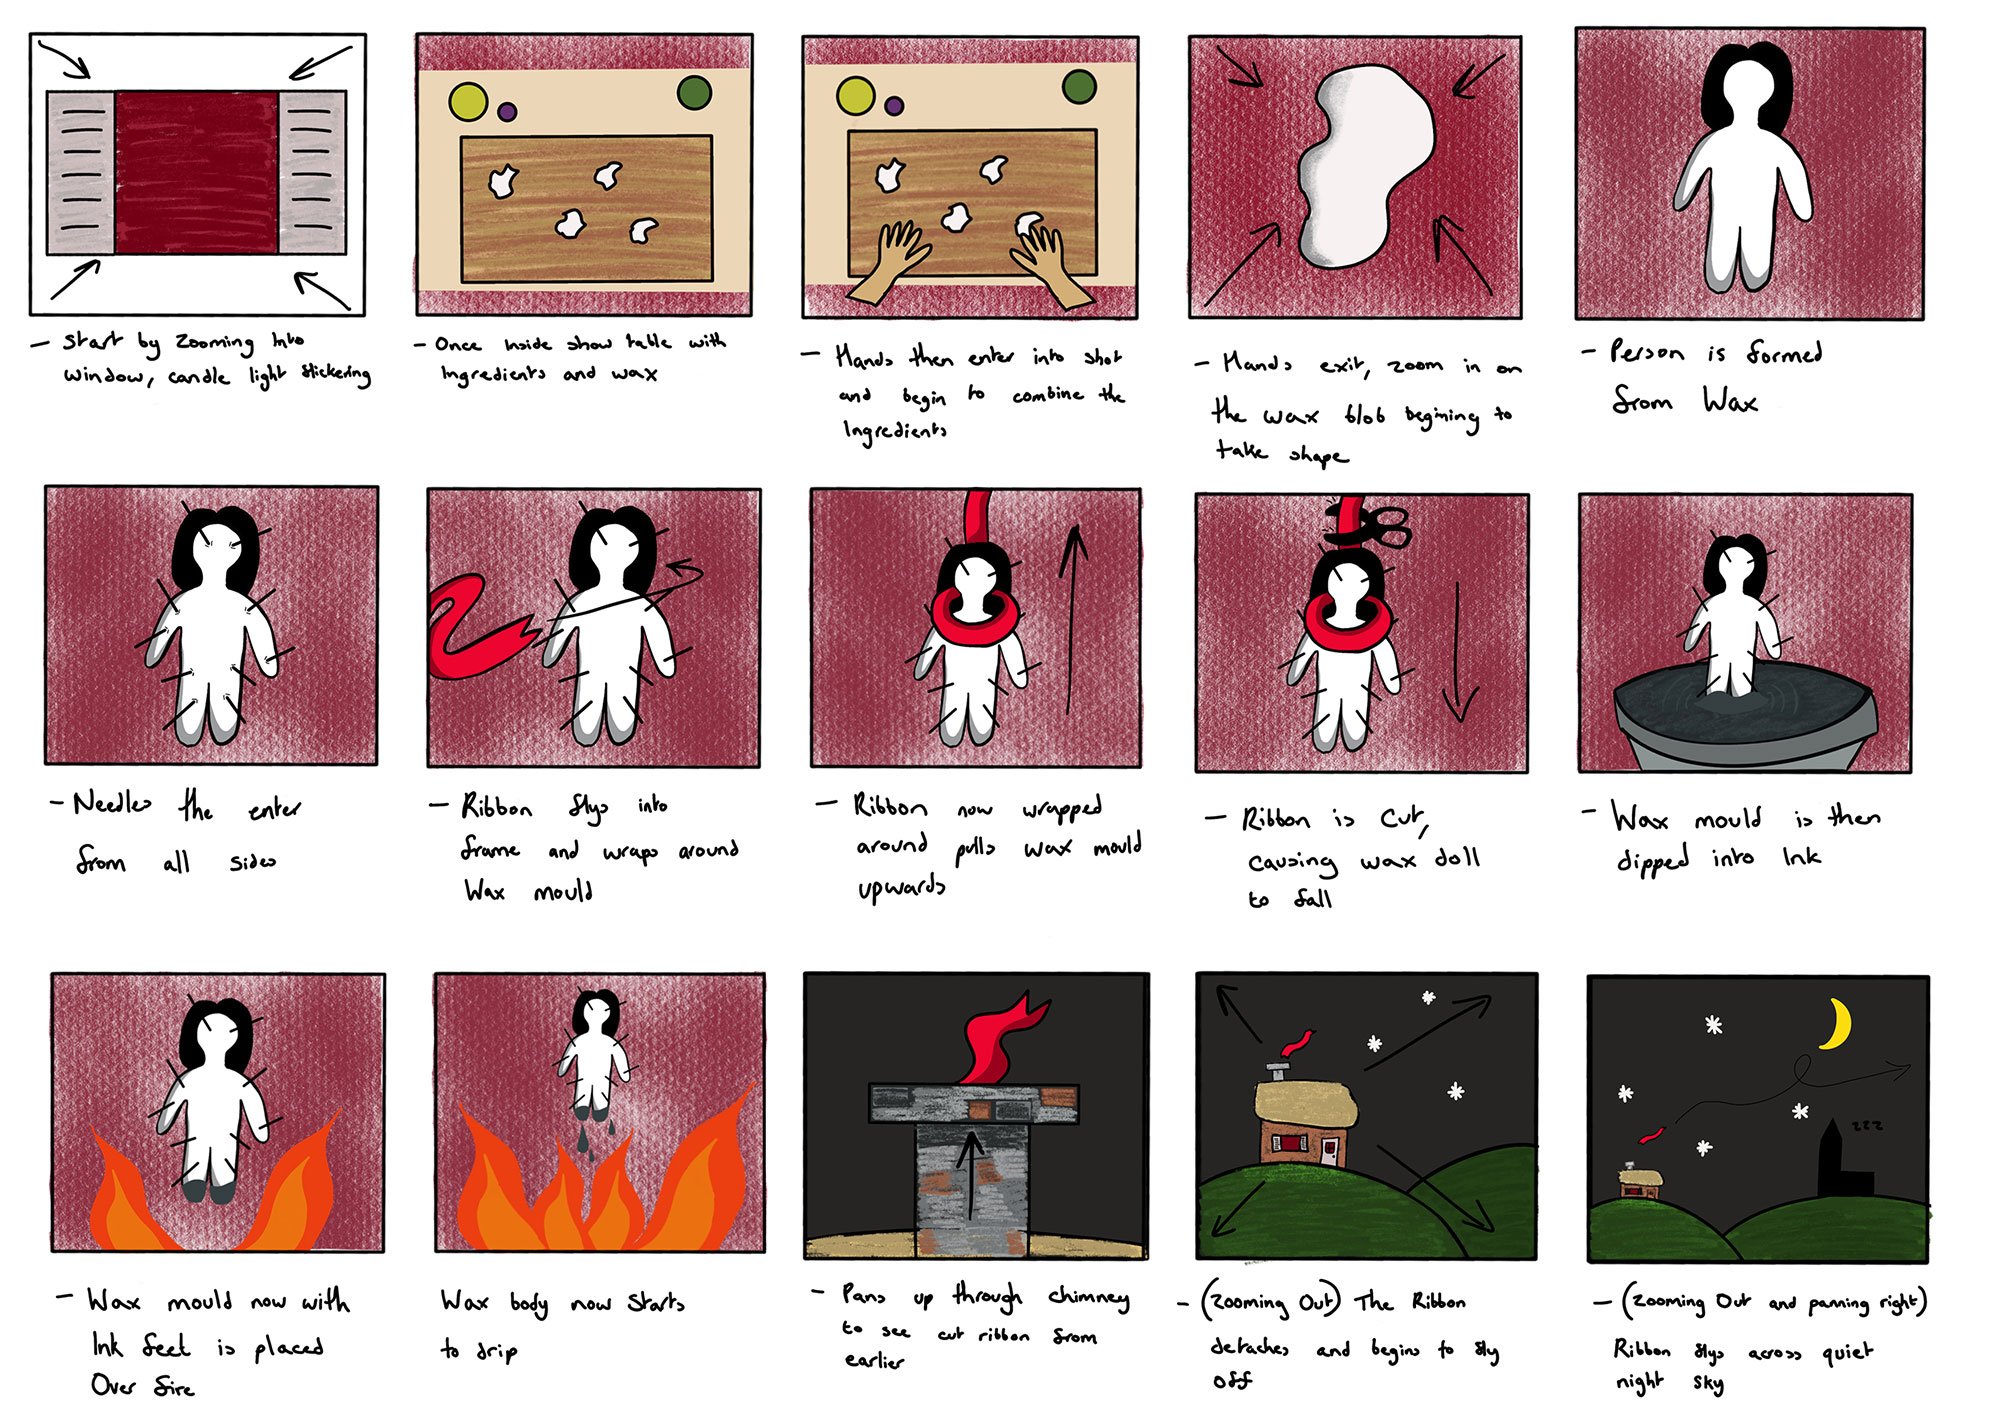
So here on the left is the first storyboard, that I drew up using procreate. This was to just show how our animation could flow, with not too much focus on the final style just yet. This was because we wanted to have a strong story concept first, so we could then turn to style and make sure both are developed as strongly as possible.
I mainly went off my sketches for the inspiration and used colours that we had discussed but other than that the main point was to show off the narrative that we were looking to construct at this point.
Scroll Down to read more about my developments with regards to motion and audio and more insight to my hand drawn type.
Development and Tests
Alongside my other tests and small motion sequences I produced from Dan’s stills I also have these three. The process was that Dan drew still images on procreate and then sent them to me as Photoshop files, which I then played with and exported as jpegs, sometimes multiple jpegs from one procreate file as I would play with different layers so that each still image was slightly different.
When I then placed the stills into After Effects, I would place them on top of each other and play with the opacity so there were smooth transitions between each later. This gave motion to the landscapes when you see the clouds and grass move or when the fire flickers for example. I would then also use a lot of scaling, zooming and positioning to give the stills more motion and this proved to be very successful for our animation.
Scenes like the worm in the intro were done just like this, all the landscape scenes were stills that I had several jpeg images of, and I gave them movement by switching between layers of jpeg images. This was a process that I had to get right otherwise there would be a lack of movement within scenes which would have brought the quality down. So as a group we were all very pleased with how it looked and I personally am proud of how consistent these scenes are throughout the animation.
My Ribbon Challenge
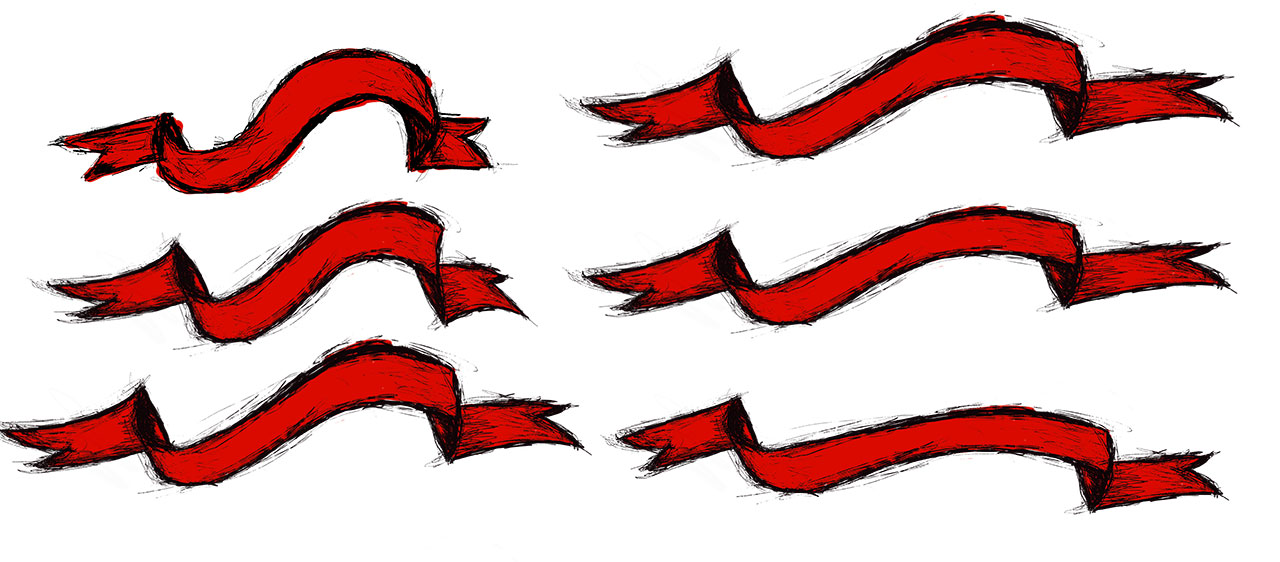
Above you can see the one of my test animations is following a red ribbon across the sky. This was our original ribbon clip to feature within our animation. However a group decision was made towards to end of the project to animate it a different way, with Dan animating it on procreate instead. But for this Dan had originally drawn two ribbon designs, one stretched out and one bunched and I was tasked with making enough variations so that I could then put them all together on After Effects and make it appear to flap in the wind. You can see these variations on the right here.
The process of animating this version was incredibly long and tricky as timing between each image of the ribbon was everything so the movement looked convincing. After hours of working, I finally came to my conclusion and made this a comp within After Effects and placed it over the landscape clip, as you can see above. I had to animate the comp of the ribbon flying through the sky as well and in the end I was happy with what I had achieved considering how tricky and time consuming this was. I was disappointed it wasn’t included in the end however I still felt to include it here as I believe it still has value and shows my skill development within After Effects, by being able to give convincing motion to still images.
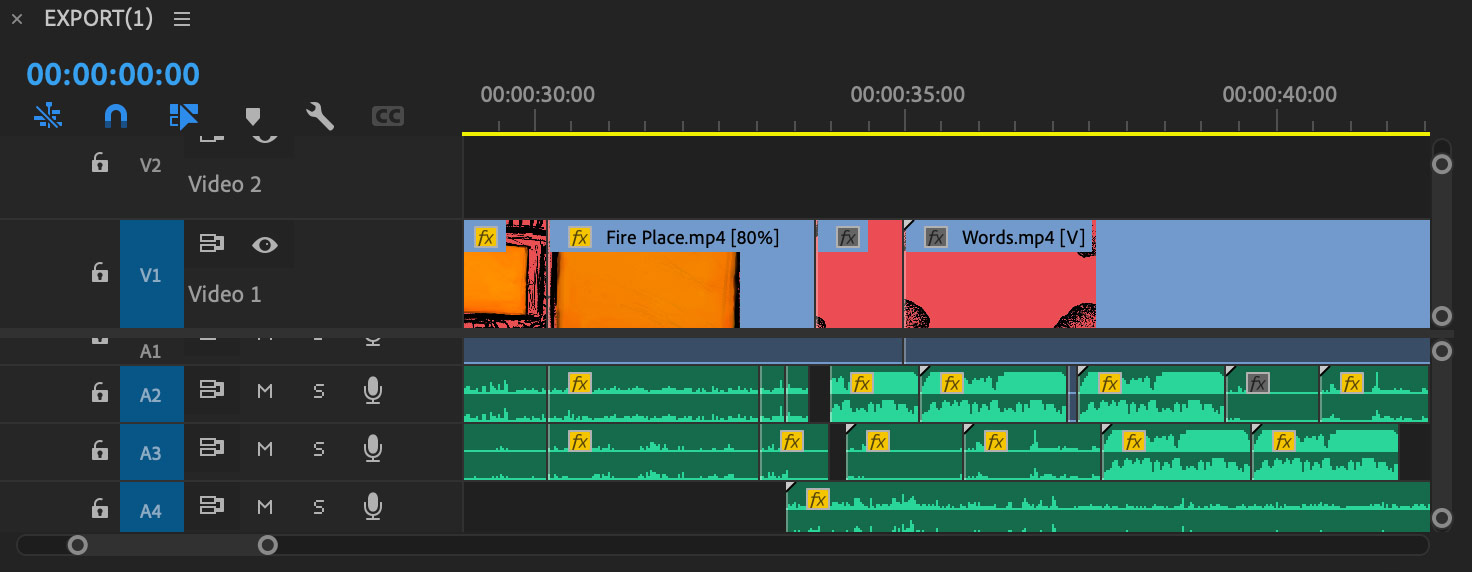
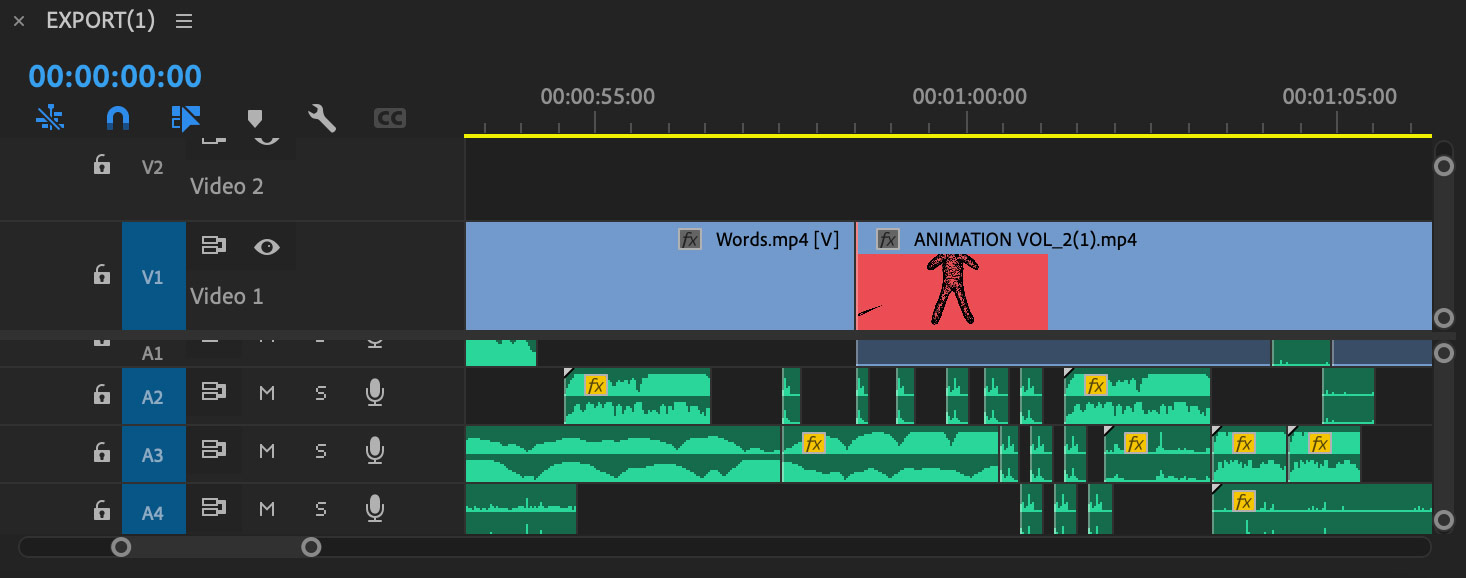
Audio Development

The green is the audio with the blue being the video. Each screenshot shows the 3/4 layers I was working across for the audio.
The kick start of my journey with audio throughout this project was the audio workshop, which I discussed on the previous page. The workshop was an opening for opportunity, and I believe we really took advantage of this as a group. We had the freedom of the campus to find or make sounds that we felt could be useful, this included walking over grit and through bushes as the crackling represented fire and dropping clay into a jug of water to have a dipped like sound.
As I said I took on the process of arranging the audio and making new sounds from the small clips we had. This meant I had a lot of overlapping audios and cutting snippets out from our clips as elements of some of the sounds were a lot more useful compared to the whole clip. Here I have attached some close ups from my Premier Pro files as this is what I used to edit the audio, as it made it easy to see how the audio could work alongside the visuals. This was a lengthy process but one I enjoyed, as you can see some areas have a lot of variation with the audio and the overlapping and layering of sounds is clear here too.
Hand Drawn Process
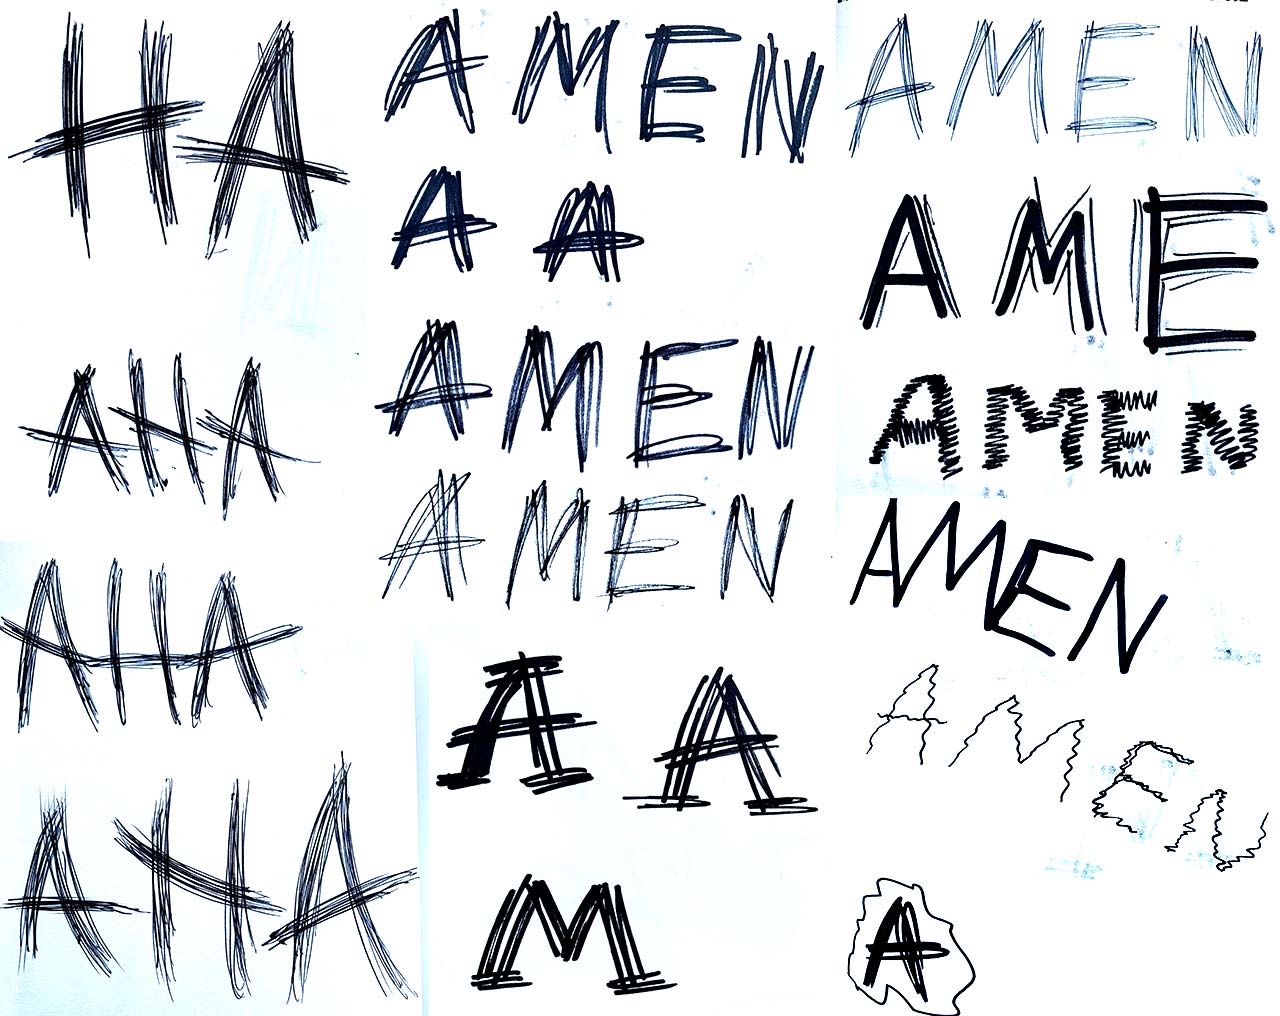
Here’s a collection of my experiments with more hand drawn type as part of the project. I used a variety of pens and just went to town with creating some distorted, scratchy type and these were my results that I didn’t decide to go forward with, but they helped guide me to what was my final style you saw on the previous page and I felt this was good experimentation that was worth including.